In this experiment, the intended result is for the buzzer and a row of LED pins to light up in sequence. This provided the team a better understanding of how to manipulate a larger array of LEDs with the Arduino.
Parts Required

Instructions
- Connect Ground pin on Arduino to negative rail on breadboard using a jumper wire.
- Insert resistors into breadboard, spacing them out with one leg connected to the negative rail.
- Insert LEDs, ensuring the longer lead (positive) is connected correctly.
- Connect negative lead of LEDs to the horizontal rail with the resistor, and positive lead to an adjacent rail.
- Repeat the process for all three LEDs.
- Complete the circuit by connecting positive leads of LEDs to Arduino pins 13, 12, and 11.
- Power on Arduino Uno by connecting it to the computer using the USB cable.
- LEDs on the board will turn on, indicating the board is powered up.
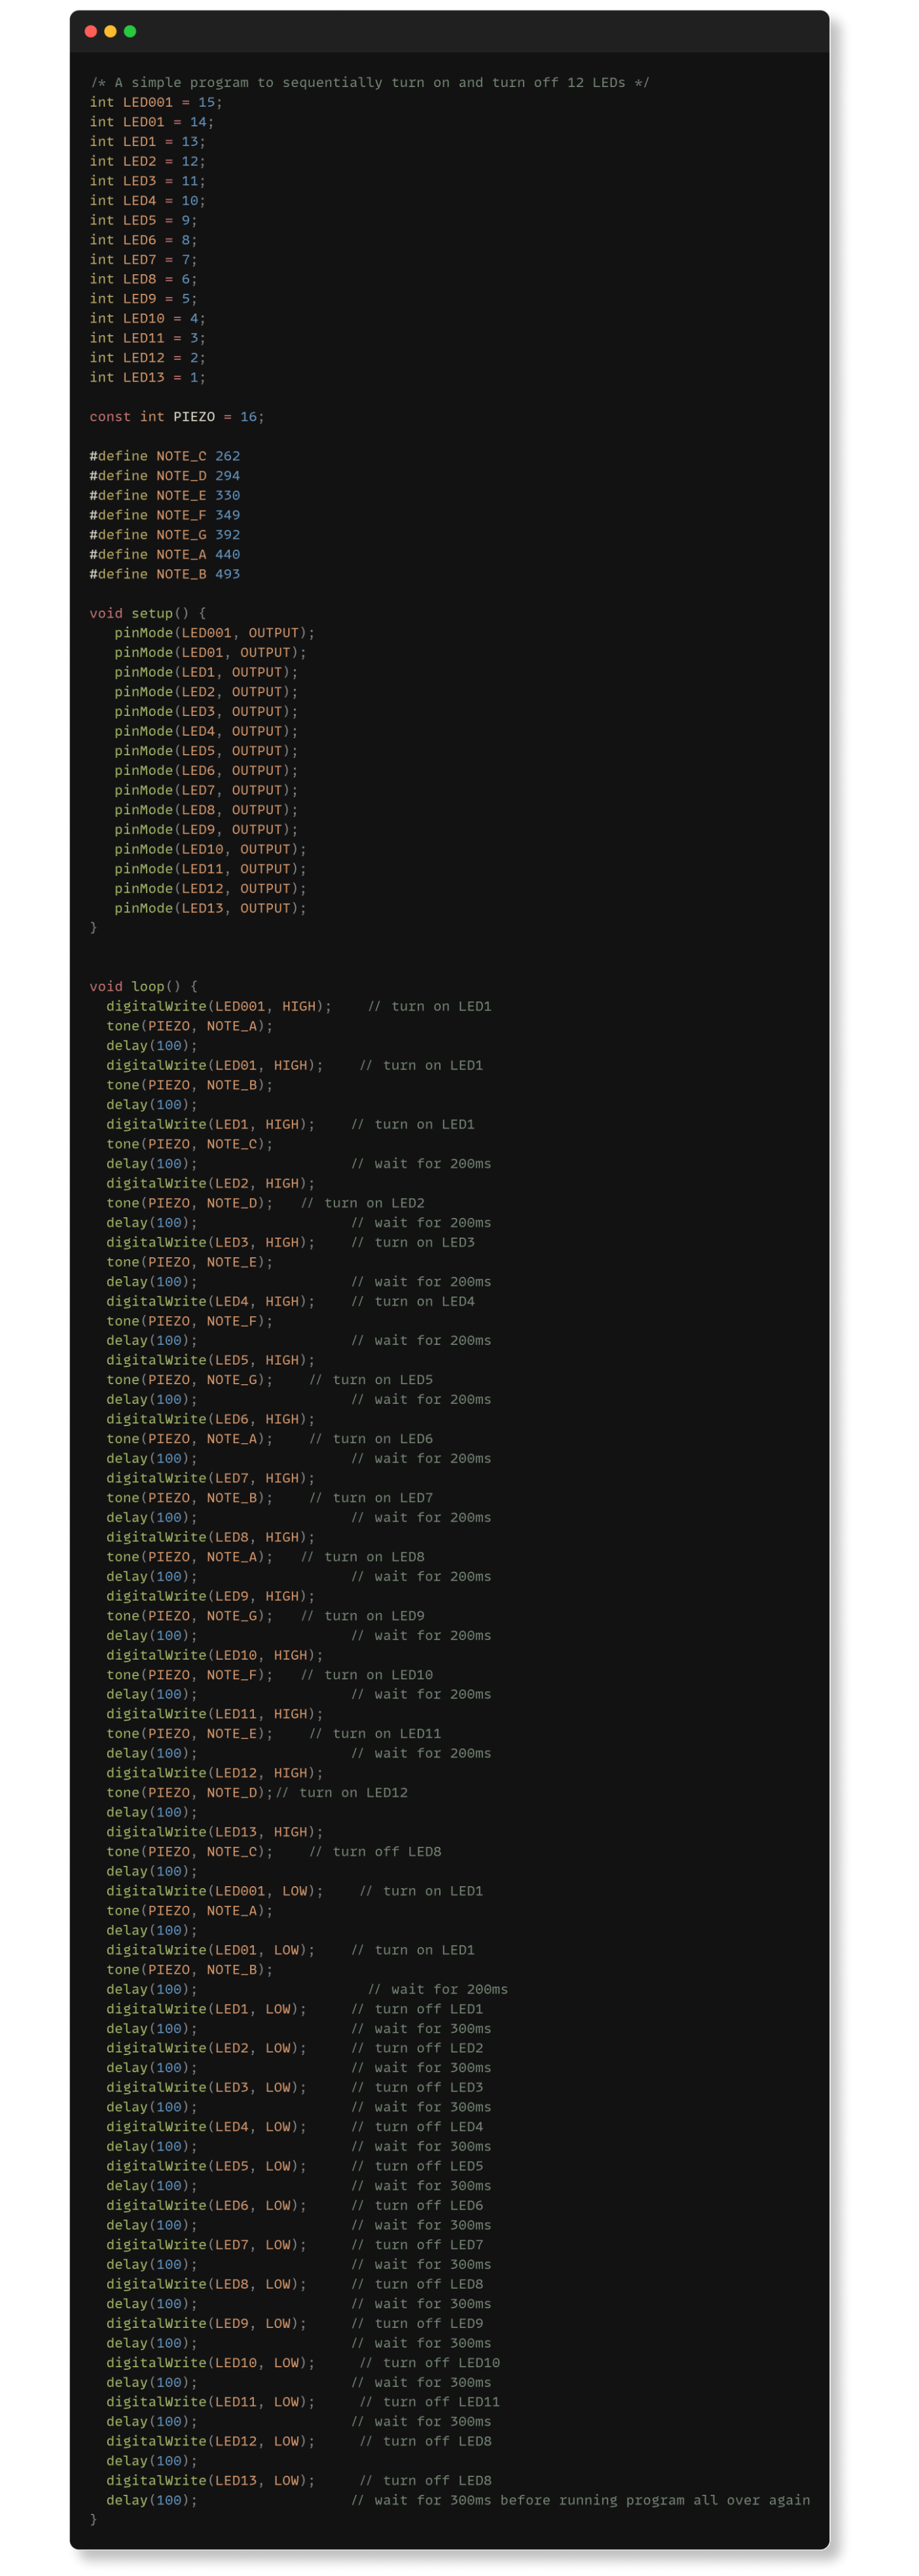
- Paste the following code to your Arduino IDE.
Code